Renovating an old house often starts with excitement, but it quickly turns stressful when mistakes begin to surface.
Cracked walls, leaking pipes, outdated wiring, and uneven floors are common in older homes. The real problem is not the age of the house; it’s starting renovation work without a proper order.
Many homeowners jump straight into painting, flooring, or interior upgrades, only to undo that work later when plumbing or electrical issues appear.
This leads to wasted money, delays, and frustration.
A successful renovation depends on doing the right work at the right time, based on structure, safety, and long-term durability.
When the sequence is clear, costs stay controlled and results last longer.
Renovation of Old House: Proper Order to Avoid Costly Mistakes
In this guide, we will outline the correct step-by-step Order Renovation For An Old House, helping you avoid costly mistakes and make informed renovation decisions.
Why Renovation Order Matters More Than Materials
When renovating an old house, most homeowners focus on materials, tiles, paint, and cabinets, but ignore the sequence of work.
This is where most cost overruns happen. Renovation is a system; doing tasks out of order creates rework.
For instance, installing flooring before fixing plumbing leads to water damage and replacement costs. Electrical rewiring done after painting can ruin walls.
Data from remodeling studies shows that 15–25% of renovation budgets in older homes go toward correcting mistakes caused by poor sequencing. Correct order ensures:
- Completed work remains protected
- Structural issues are addressed early
- Labor isn’t duplicated
- Costs stay predictable
Sequence matters more than choosing the fanciest tiles or fixtures. A house renovated in the wrong order risks wasted money, wasted time, and ongoing frustration.
Step 1: Full House Inspection and Structural Assessment
Before picking colors or furniture, understand your house’s condition. Hidden issues like cracks, moisture, and termite damage can become costly if ignored.
What to inspect:
- Foundation cracks: Vertical or horizontal cracks can signal serious structural issues.
- Roof condition: Check for sagging beams, leaks, or rot.
- Load-bearing walls: Ensure they can support any new modifications.
- Pest and moisture damage: Termites weaken wood; water can damage walls.
Professional inspections recommended:
| Inspection Type | Purpose |
| Structural engineer | Checks foundation and load-bearing walls |
| Roof inspection | Identifies leaks, sagging, or decay |
| Pest inspection | Detects termites and wood rot |
| Moisture testing | Finds hidden leaks or dampness |
Ignoring this step can lead to serious safety risks and redo costs.
Step 2: Budget Planning With a 20% Buffer
Old House Renovations always reveal surprises. Budgeting without a buffer is risky. Unexpected structural repairs, wiring replacements, or plumbing upgrades are common.
How to plan effectively:
- List mandatory repairs first (safety and structure)
- Separate “must-haves” from “nice-to-haves.”
- Add a 20% contingency for unexpected costs
- Lock material costs early to avoid price hikes
Example budget allocation:
| Category | % Allocation |
| Structural repairs | 25–30% |
| Electrical & plumbing | 20–25% |
| Finishes (paint, flooring) | 25–30% |
| Labor | 15–20% |
| Contingency | 20% |
A solid plan prevents overspending mid-project and keeps work moving smoothly.
Step 3: Legal Approvals, Permits, and Drawings
Many homeowners skip approvals and face fines or project halts. Proper permits protect your renovation investment.
What to get approved:
- Floor plan changes
- Structural modifications
- Electrical upgrades
- Plumbing reroutes
Documents needed:
- Approved architectural drawings
- Structural calculations
- Electrical load charts
- Plumbing schematics
Failing here can mean demolition orders or fines, which cost both time and money.
Step 4: Demolition and Strip-Out Work
Demolition uncovers the real condition of your home. Old finishes, broken tiles, damaged ceilings, and unsafe partitions must go.
Safety tips:
- Shut off electricity and gas
- Seal off other areas to prevent dust spread
- Use proper protective equipment
- Dispose of debris legally
At this stage, hidden problems often appear. Budgeting and planning for surprises is crucial.
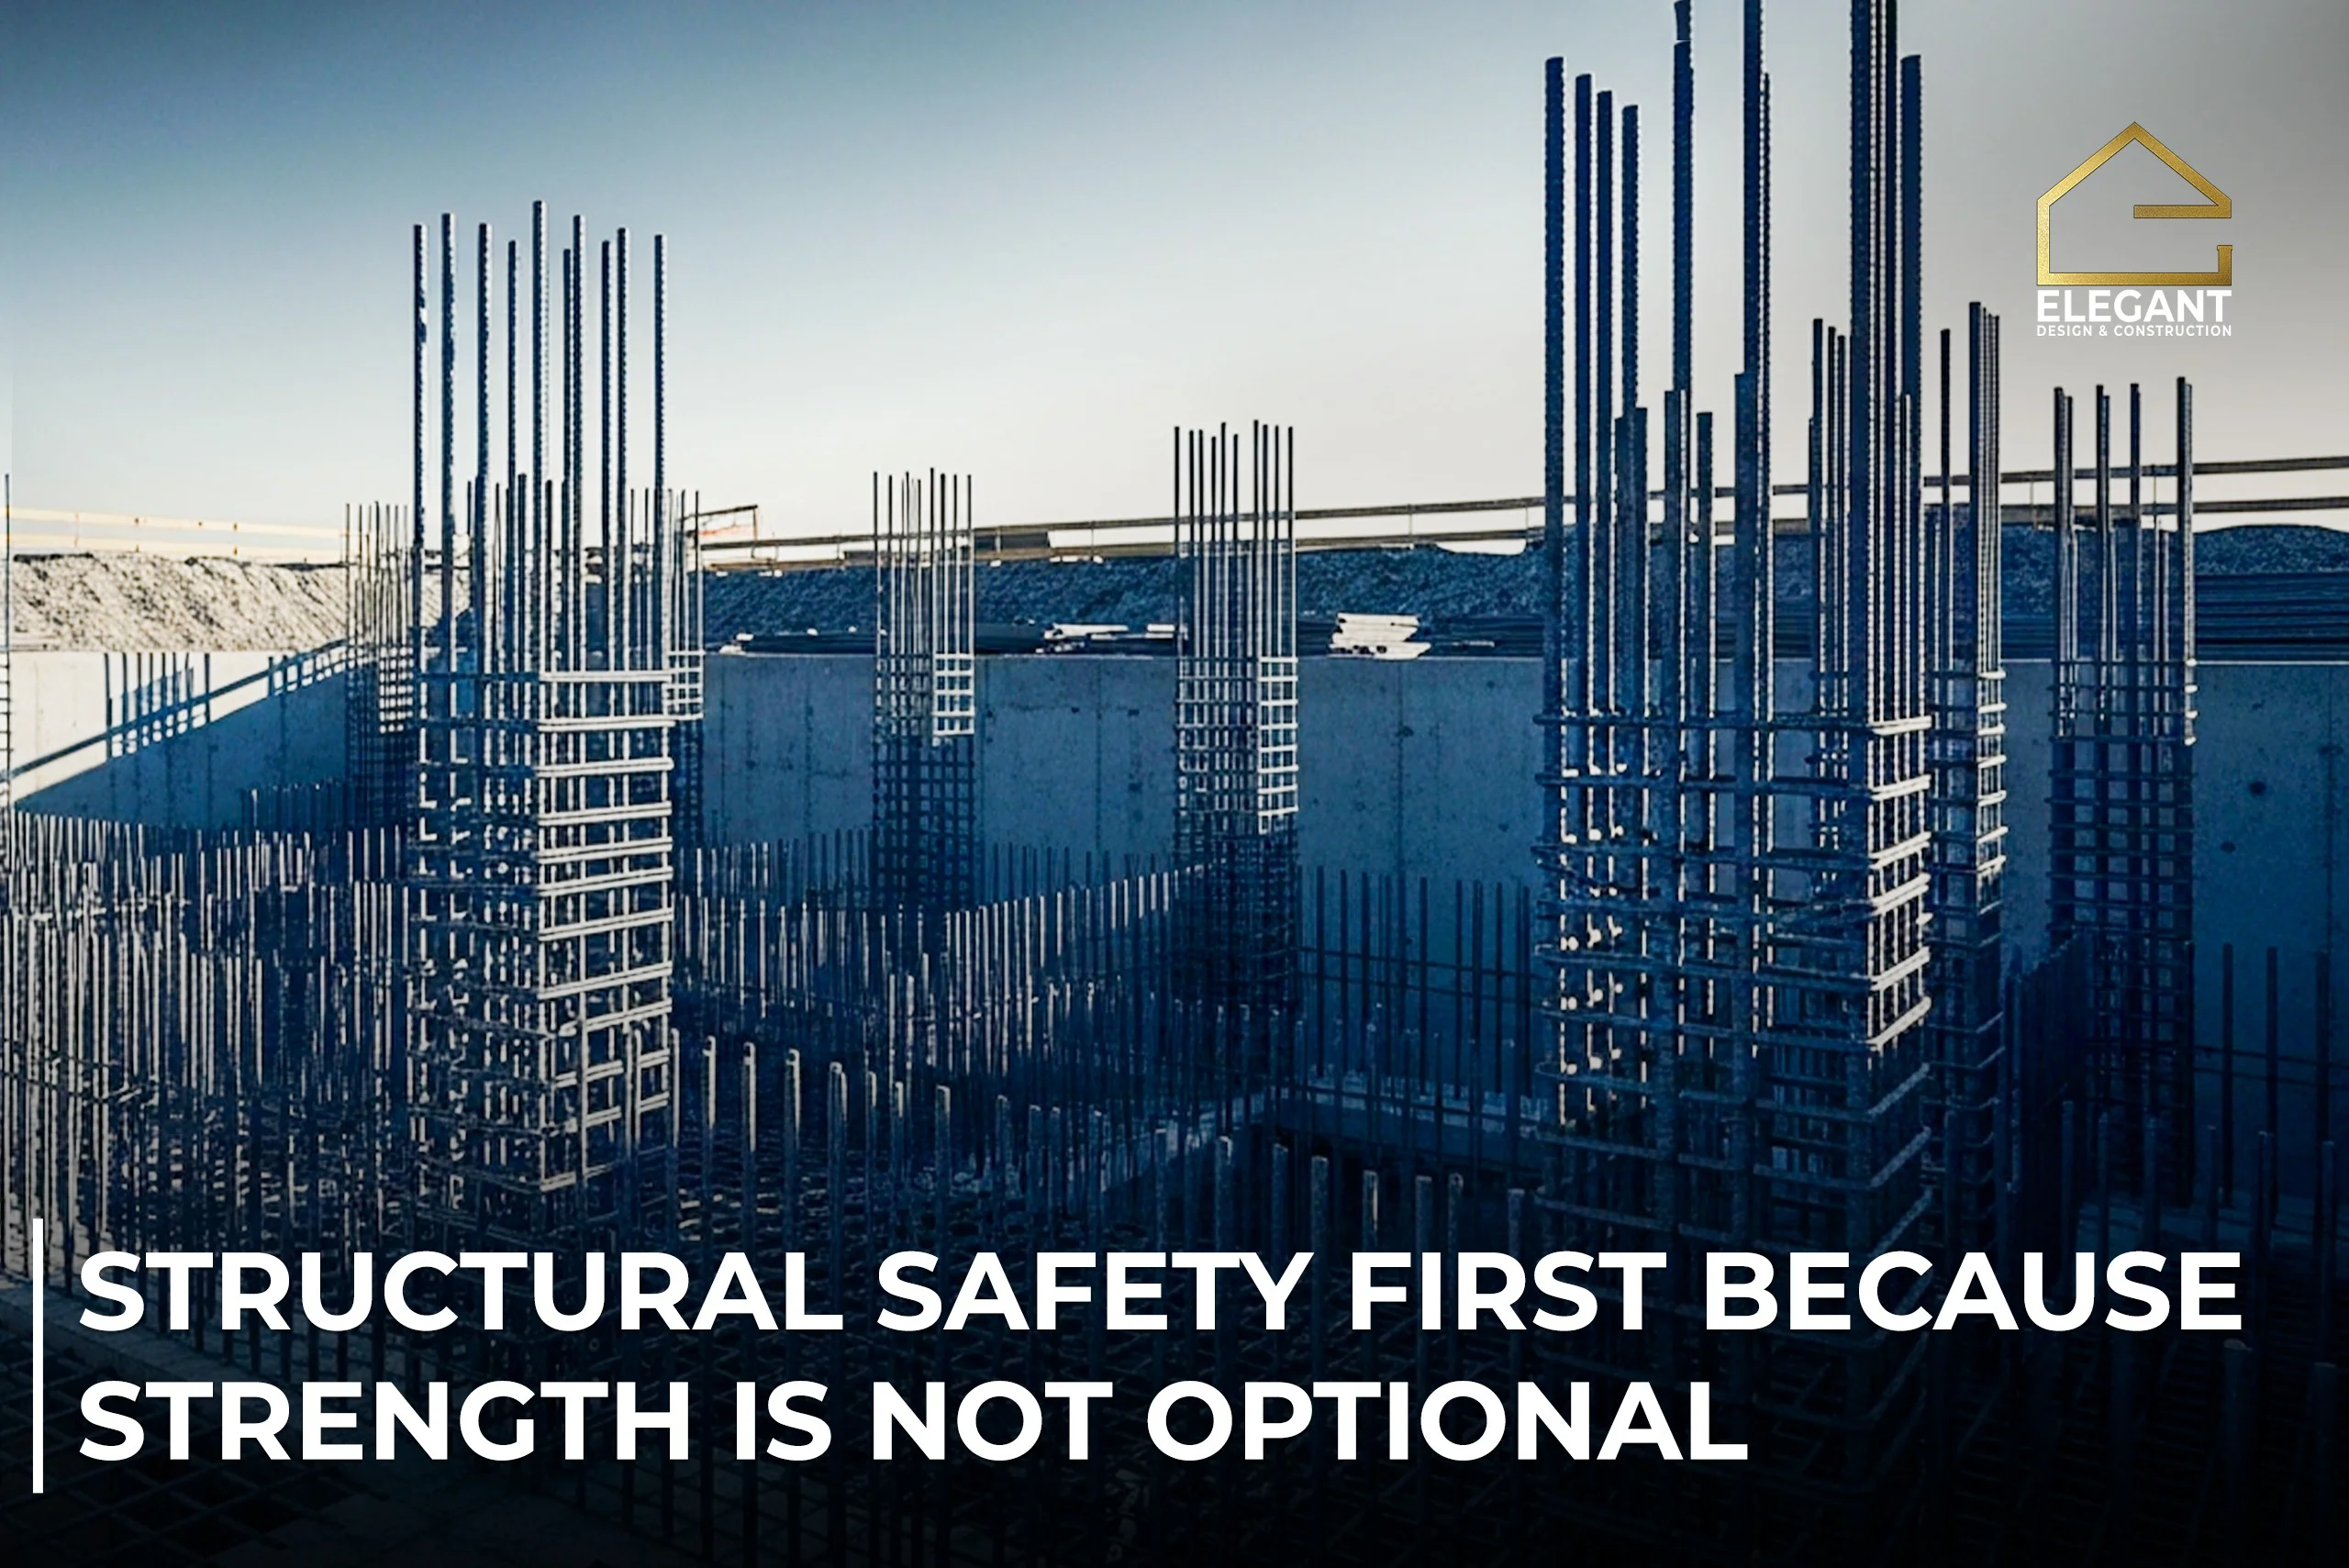
Step 5: Foundation, Roofing, and Structural Repairs
Once demolition exposes the skeleton, it’s time to stabilize the house. Structural work is non-negotiable.
Tasks include:
- Foundation reinforcement
- Roof beam replacement
- Crack stitching in walls
- Waterproofing of vulnerable areas
Why early structural repair matters:
According to construction data, 60% of renovation failures in old houses relate to neglected structural issues.
Fixing these first ensures all subsequent work remains safe and long-lasting.
Step 6: Plumbing and Drainage System Renewal
Old pipes often fail silently. Leaks hidden under walls or floors can destroy new finishes.
Plumbing updates to include:
- Replacing corroded pipes
- Updating drainage lines
- Installing new bathroom and kitchen connections
Pro tip: Pressure-test all pipes before closing walls or floors to prevent costly damage later.
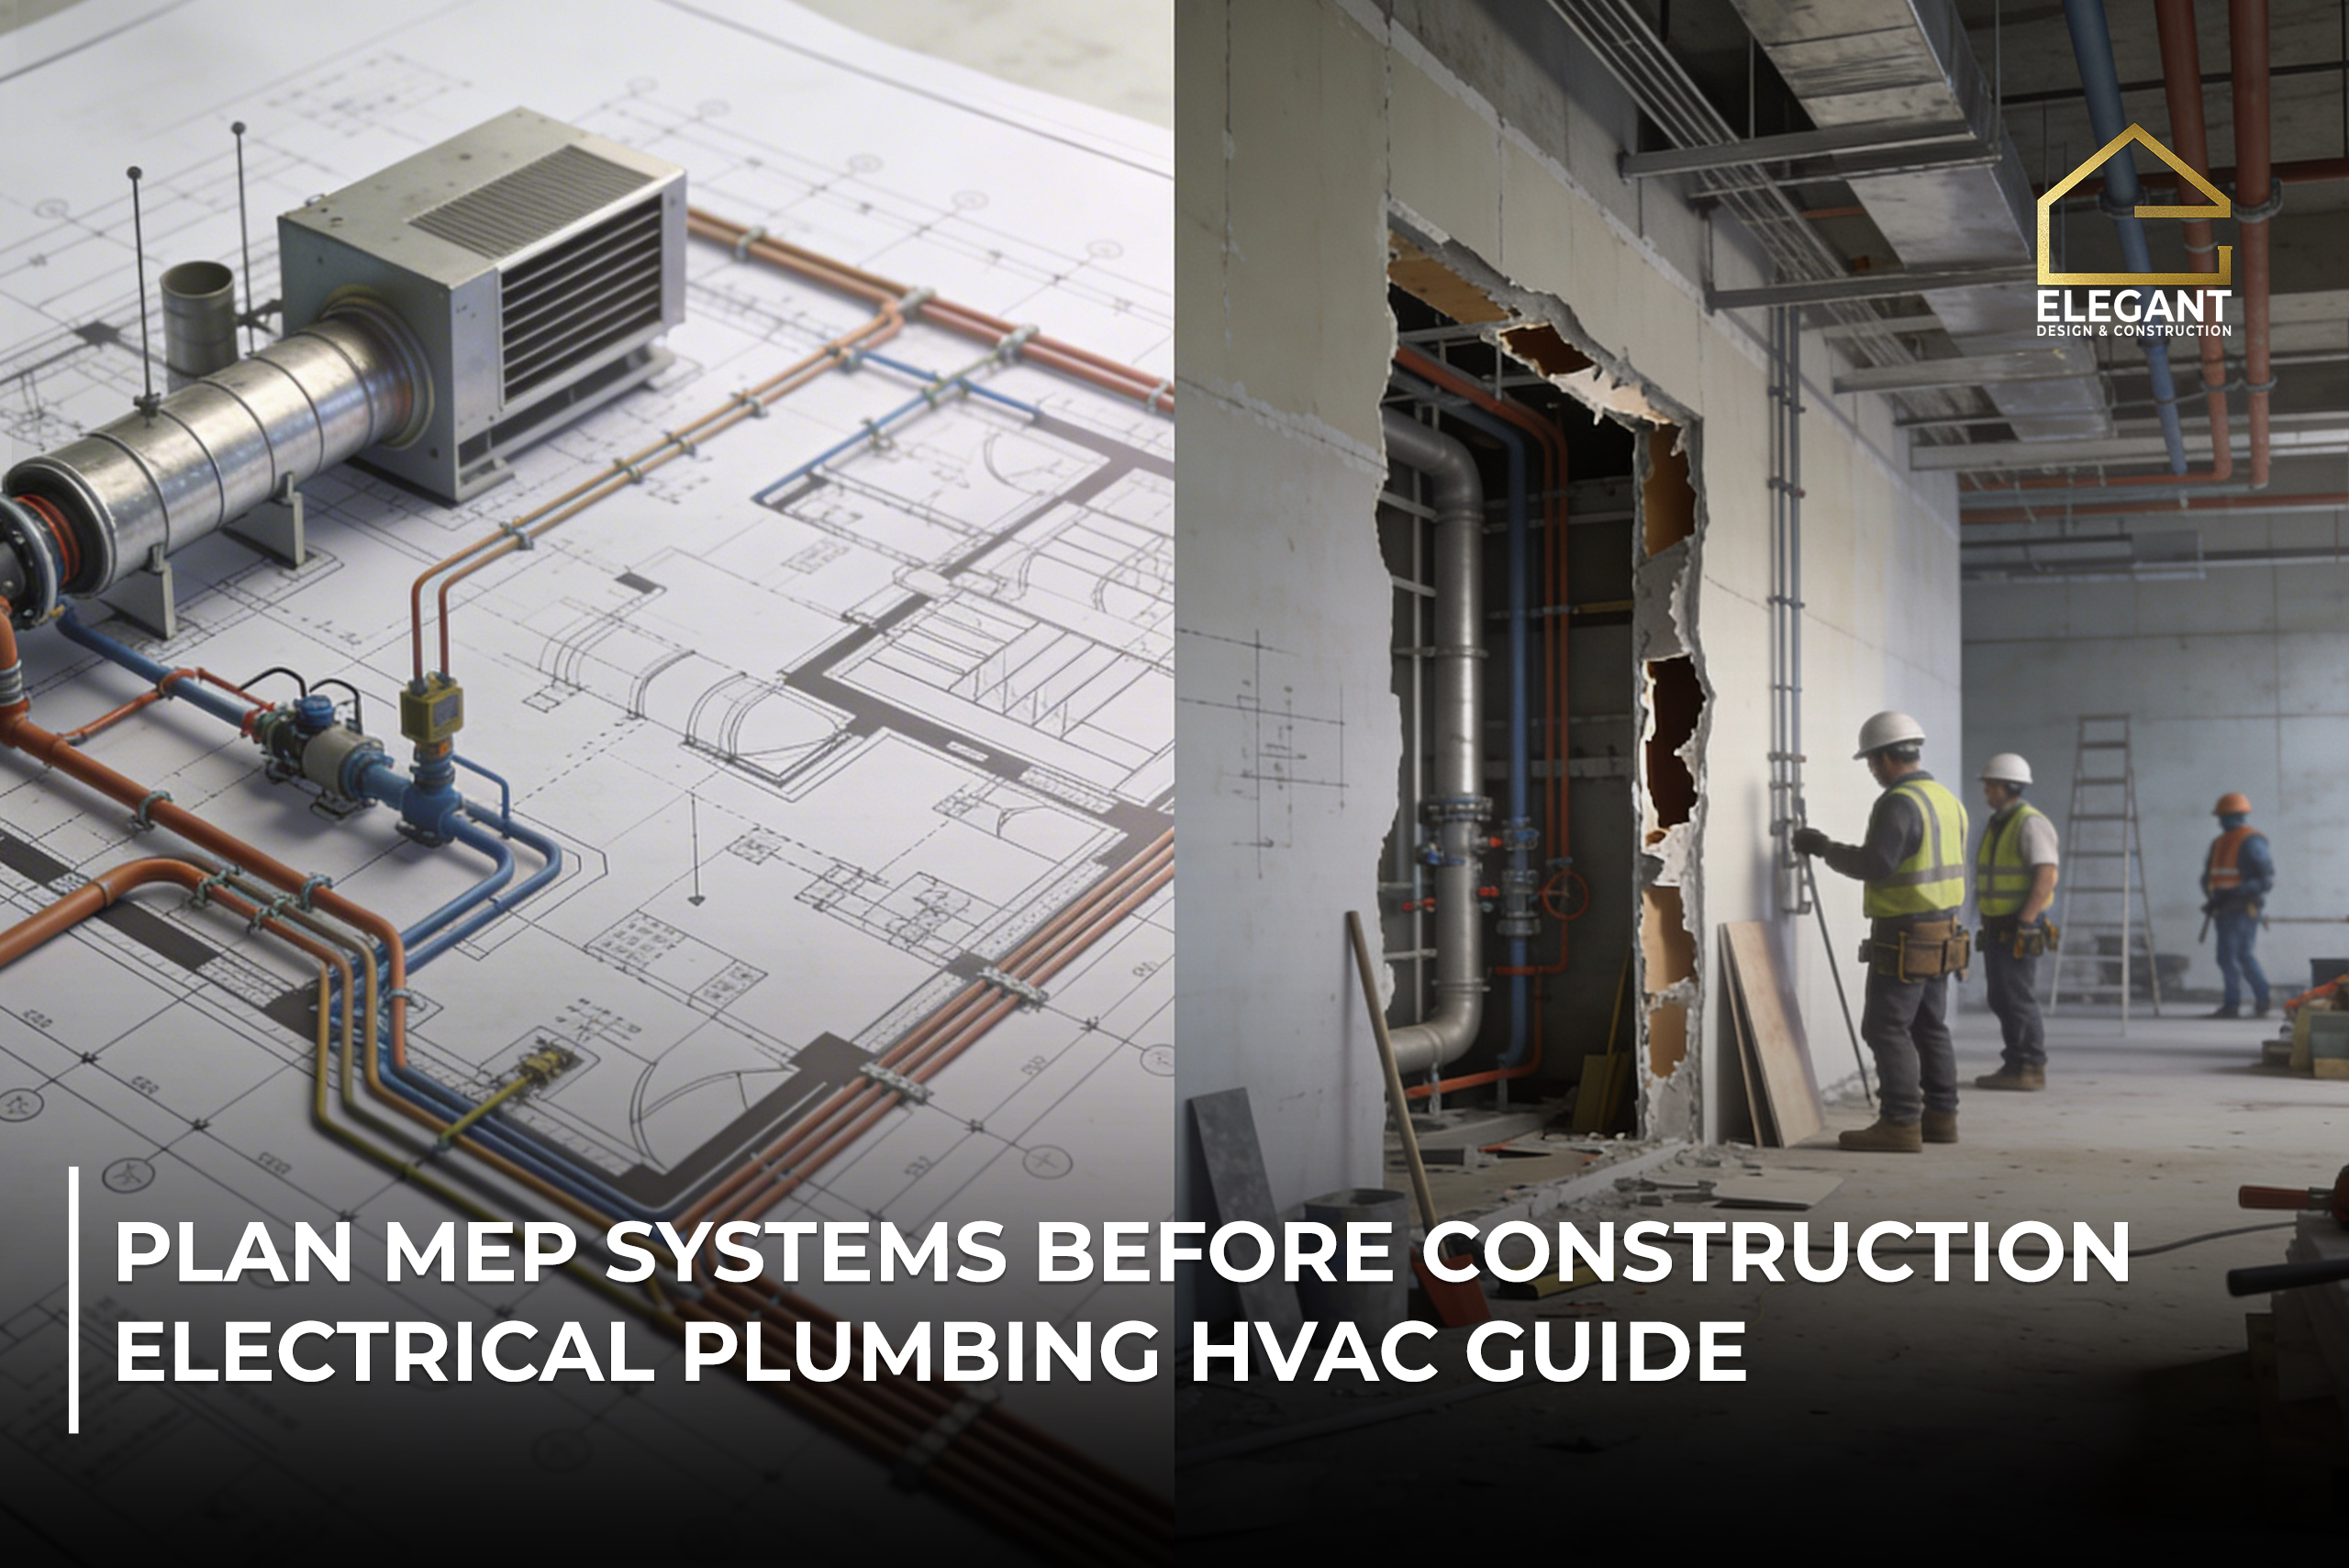
Step 7: Electrical Wiring and Load Upgrades
Modern homes demand higher electrical loads. Old wiring often can’t handle new appliances, leading to hazards.
Electrical tasks:
- Replace old wiring
- Upgrade the load and circuit breakers
- Install proper earthing and grounding systems
Mistake to avoid: Never install wiring after plastering or painting it will require rework.
Step 8: HVAC, Insulation, and Ventilation
Proper heating, cooling, and ventilation improve comfort and prevent hidden damage.
Tasks include:
- Installing ductwork and HVAC units
- Adding insulation in walls and roofs
- Installing exhaust and ventilation systems
Poor planning here can lead to mold, high energy bills, and inefficient air circulation. Install HVAC before walls and ceilings are finalized.
Step 9: Wall Plastering and Ceiling Work
Walls and ceilings come next. They form the canvas for all finishes.
Work involved:
- Leveling and repairing wall surfaces
- Plastering ceilings
- Repairing or installing cornices and trims
Tip: Use moisture-resistant materials in wet areas like kitchens and bathrooms. Allow plaster to cure completely to prevent cracking or peeling of paint later.
Step 10: Flooring Installation
Flooring is fragile and should be one of the last structural tasks. Installing too early risks scratches, stains, or cracks from ongoing work.
Flooring types and timing:
| Flooring Type | Install After |
| Tiles | After plastering and plumbing |
| Wood | After HVAC and electrical work |
| Vinyl | After painting and trim work |
Always protect floors with temporary coverings until the renovation fully finishes.
Step 11: Painting, Fixtures, and Final Finishes
Painting and fixtures give the house its final appearance.
Tasks:
- Painting walls, ceilings, and trims
- Installing lights, switches, and socket covers
- Cabinet and wardrobe fittings
Painting after dust-producing work ensures a clean, lasting finish. Fixtures should be installed after all structural, plumbing, and electrical tasks are complete.
Step 12: Final Inspection, Testing, and Move-In
Never skip a thorough inspection. Testing ensures everything works as expected.
Check:
- Water pressure and drainage flow
- Electrical circuits and loads
- Door, window, and fixture operation
Create a snag list and resolve minor issues before moving in. A proper final inspection prevents post-renovation frustrations.
Common Renovation Mistakes That Cost Thousands
| Mistake | Consequence |
| Ignoring work order | Rework and extra cost |
| No contingency budget | Project stalls, overspending |
| Cheap labor | Poor quality, structural risks |
| Skipping structural assessment | Safety hazards, major future repairs |
Avoid these, and your renovation stays under budget, on schedule, and stress-free.
Emotional Truth: Renovation Is Stressful, but Order Brings Control
Renovating an old home is messy, noisy, and stressful. Dust, decisions, and surprises test patience.
However, following the proper renovation order turns chaos into control. You can track progress, anticipate costs, and make decisions with clarity.
Doing things in the right sequence doesn’t just save money it saves your time, energy, and peace of mind.
Conclusion
Renovating an old house is more than updating walls or replacing fixtures it’s about planning, sequencing, and protecting your investment.
Every step, from structural inspection to final finishes, matters. Skipping inspections, ignoring permits, or rushing flooring and painting can turn a promising project into a costly disaster.
Following the proper renovation order ensures that each task builds on the previous one, preventing rework, minimizing stress, and controlling expenses.
It also allows you to address hidden issues early, secure the safety of your home, and create a living space that lasts for decades.
A well-structured approach transforms renovation from chaos into a smooth, manageable process.
By sticking to the step-by-step order outlined in this guide, you can renovate your old house efficiently, avoid costly mistakes, and enjoy a home that is safe, functional, and beautiful.
About Elegant Design PK
Elegant Design PK is a leading design and construction company based in Islamabad, known for delivering innovative and high-quality residential and commercial projects.
The company specializes in home renovations, interior design, and complete construction solutions, combining creativity with structural precision.
It focuses on functionality, durability, and aesthetic appeal in every project, ensuring spaces are both practical and visually striking.
With a reputation for excellence and attention to detail, it has become a trusted name in Islamabad’s construction and design industry.
Elegant Design PK transforms ideas into reality, creating spaces that reflect modern design standards and lasting quality.